
 Synopsis: I describe a short activity for high school students on visualizing protein structures and etching them in wood.
Challenge: If you’re familiar with proteins, you might like to ask yourself before you get to Part 2: If you were to show non-scientists a few protein structures, which structures would you pick?
1. Background: SAIL
As in each of the past 12 years, I’ve co-run a one-week “SAIL” camp for high school students, targeting low-income students especially with a week of activities on the University of Oregon (UO) . I’ve written about this before (“The ice cream and the dead people”, “SAIL Recap 2017”), and our Physics + Human Physiology program hasn’t changed much in recent years. “If it ain’t broke, don’t fix it,” of course, and since students give rave reviews of the week, and those of us running it are happy with it as well, there’s no reason to make major alterations. (The Physics and Human Physiology parts of the camp are largely separate, but there are some connections we make between the two.) I’ll comment at the end of this post on some of the perennial favorite activities — Prof. Graham Kribs’ Physics of Climbing session, Prof. Eric Corwin’s liquid nitrogen ice cream, and time in the cadaver lab. Outside our camp, in the broader SAIL program, there’s lots of change — a steady expansion now to 16 camps serving about 400 students, and this year, for the first time, a small pilot residential program with some students staying in the UO dorms. (The goal of the residential program is to serve students from throughout the state, not just the Eugene-Springfield area.) Regarding outcomes, a considerably higher fraction of alumni of the summer and academic-year mentoring programs pursue post-secondary education than their peers. (I don’t have the numbers on me.)
There was one new activity in our Physics + Human Physiology camp this year, however, and that’s the subject of this post. A few weeks before the camp, I ended up with an extra hour in the SAIL program that I needed to fill. It’s not too hard to find volunteers, but the back-and-forth of scheduling, emailing, talking to people, etc. is tedious, and I decided that it would probably be more enjoyable and no less time-consuming to design and implement a new activity myself. (I wouldn’t have thought this ten years ago, but I have a lot more outreach and teaching experience now!) At the same time, Dean Walton, a science librarian, was thinking about doing something connected to a SAIL tour of UO’s student Makerspace, which he runs. (More on this in part 3.)
2. A protein structure activity
I decided to create an activity related to protein structure, with the goals of conveying that proteins are molecules with particular, and often remarkable, three-dimensional structures, and that we can use various tools to visualize and represent these structures. I spent about 10 minutes introducing proteins as chains of amino acids, and giving a sense of scale. I used hemoglobin as an example, with visualizations of it projected from my computer. We then went to see some physical models. My (retired) colleague Brian Matthews was a pioneer of biophysical X-ray crystallography, and we’re lucky to have several large, hand-built models of various proteins decorating the hallways.
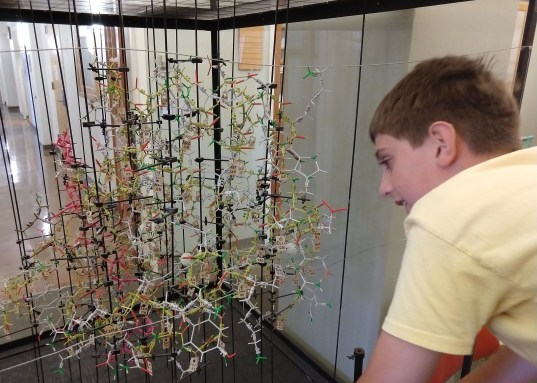
To prepare, my intrepid assistant and I stared at some of these models, especially a phage lysozyme, shown above. On a computer, it’s easy to see structural motifs like alpha helices. In fact, every computer visualization program will happily represent such characteristics with stylized coils and sheets. With physical balls and sticks for every atom and bond, it’s much harder to see these patterns, and more impressive that researchers recognized them decades ago. In addition, of course, the computational models are easy to rotate and zoom in and out of; with the physical models we’re stuck crouching and climbing on chairs.
At the science library, the SAIL students in pairs on laptops looked up in the Protein Data Bank (PDB) several proteins I had pre-selected as being structurally interesting:
- Cholera Toxin, subunit B (PDB ID: 1PZJ)
- Green Fluorescent Protein (PDB ID: 1EMA)
- A potassium channel (PDB ID: 1K4C)
- An antibody (Immunoglobulin) (PDB ID: 1IGT)
- Kinesin (PDB ID: 3KIN)
- An amyloid fiber, from Alzheimer’s plaques (PDB ID: 2LMN)
- An HIV capsid (PDB ID: 3J3Q); I suggested that students zoom in a lot.
I also gave links to the “Molecule of the Month” page for each of these, which gave more information.
These days one doesn’t even need a separate protein structure viewing program; from a web browser itself, one can view and manipulate 3D structures of every protein at the PDB, even altering the representations and coloring. Beforehand, I gave out some tasks to scaffold the kids’ explorations:
Figure out which of the following applies to each of the proteins:
- Has 2 symmetric parts (like feet, with thin legs attached): _____________
- Has 3 parts connected by flexible linkers: _____________
- Has 4 symmetric parts: _____________
- Has 5 symmetric parts: _____________
- Looks like a barrel: _____________
- Stacks to form fibers: _____________
- Has over 200 pieces making up a large structure: _____________
I let students spend time (20 minutes? I can’t remember exactly) exploring the structures, rotating, zooming, and changing representations. In addition, each student was asked to pick one particular view they particularly liked and save a screen capture of it — more on this below. While all this went on, I wandered around and chatted with the students as they worked.
I had no idea how this would go. There have certainly been activities, with SAIL and in classes, that students find less interesting than I expect. (Looking through microscopes, for example, is something most scientists overestimate the appeal of.) This, however, went very well. I overheard several students saying “Cool!” as they dragged proteins around, and they were surprisingly absorbed.
As they finished, and for about ten minutes afterwards, I showed some illustrations and animations of some of the proteins (including pieces of the remarkable [“Inner Life of the Cell”](https://www.youtube.com/watch?v=wJyUtbn0O5Y) video), talked about what some of them do, and answered random questions. Some of these (“Why do you like proteins so much?”) allowed me to comment on the physics that governs proteins — how physical forces allow chain-like molecules to fold themselves into specific shapes. One student asked “What is life?” which I deferred to later in the week…
3. The Makerspace, and more visualization options
As in the past two years, UO librarian Dean Walton has given a tour of UO’s Makerspace to our SAIL camp, coupled to some activity. This time, the activity was etching in wood the protein images the students had selected. The wood slabs were approximatesly 4 inches square; one of them (cholera toxin) is shown at the top of the post. Dean noted that the students would like having a tangible, and individualized, souvenir; he was right. The students loved getting these, which I found surprising since I have little fondness for trinkets that take up space or that I feel guilty about throwing away. But, I’m not 16!
There are, of course, many ways to visualize proteins. On one occasion when I taught my “Physics of Life” course for non-science-majors, I had students 3D print protein structures and comment on whether these were useful in comparison to views on the computer screen. Overwhelmingly, students disliked the 3D printed objects, and I agreed; the opacity and small size made it hard to get a sense of what the structures were like. More recently, I attended a demonstration of various science-related virtual reality visualizations, part of UO’s science teaching journal club (Hi Julie!). Most of these were pointless, but the one that I really liked was, in fact, a representation of protein structures. Like the computer-screen visualizations (e.g. the links above) one could nicely rotate and zoom, but now with a good sense of depth. In general I’m not a fan of educational technology, and it remains to be seen whether such 3D interactivity would actually help people learn things, but nonetheless I was pleasantly surprised.
4. Flamin’ Hot Cheetos Ice Cream, and concluding thoughts
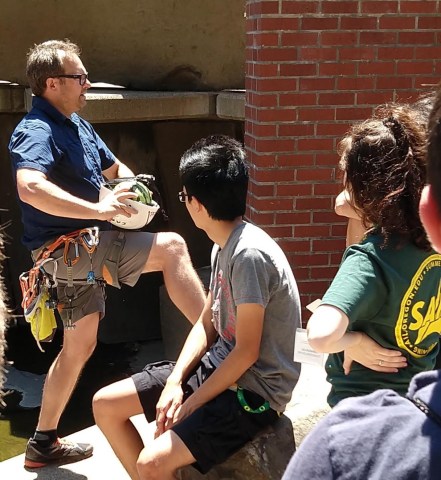
From conversations and from a survey at the end, it was clear that the students liked the camp a lot. They were uniformly positive about the activities, with none they disliked. (We’ve sometimes had one or two duds, so this is especially remarkable.) Even brand new activities, like Kelly Kyland and Sudhanshu Shekhar in Bob Guldberg’s lab exploring bone biomechanics, were a hit. Exactly as in each of the past few years, the students’ favorite activities of the week, assessed by a survey at the end, were a session on human anatomy in UO’s cadaver lab (run, I think, by Nina Morrison, Human Physiology); the Physics of Climbing (Graham Kribs, Physics, pictured above with a watermelon wearing a helmet); and liquid nitrogen ice cream (Eric Corwin, Physics). Eric is always keen on exploring odd flavors, so in addition to nice ones they made, for example, Flamin’ Hot Cheetos + Mountain Dew + Tapatio Sauce ice cream; I dropped by at the end of the activity and tasted it — it was as revolting as it sounds.
I think our camp continues to be successful in large part due to its activities being very hands-on, and to the consistent volunteering of many students and faculty in both the Physics and Human Physiology departments. Direct faculty involvement is key, and this is the case for most, but not all, the SAIL camps. There are a few in which the camp is foisted upon graduate students or postdocs (I’m looking at you, Biology!), who are very capable, but which makes continuity difficult, and which signals to the rest of the department that the outreach isn’t valued, making it still harder to attract faculty volunteers and feeding back on itself. I’m very fond of the SAIL program, and I’m glad that through many people’s efforts it has expanded far beyond what was imagined over a decade ago.
Today’s illustration…
No drawing today; just a photo of an etched protein image.
